
How to Use AkuShaper for Hand Shaping Surfboards
When people hear “surfboard design software,” they often assume the end goal is CNC machining.
But you don’t need a CNC machine to get a huge amount of value out of AkuShaper.
In fact, AkuShaper can be one of the most useful tools in a hand shaper’s workshop.
You can use AkuShaper to design and print full-size surfboard templates, choose the right blank, establish rocker and rail references, plan fin placement, track dimensions, communicate with customers, and create a permanent digital record of every board you shape.
The actual shaping can still happen completely by hand.
Think of AkuShaper as the blueprint. Your planer, saw, sanding blocks, and hands still build the board.
Here are some of the most useful ways hand shapers are using AkuShaper.
1. Design and Print Full-Size Surfboard Outline Templates
Every hand-shaped surfboard starts with an outline.
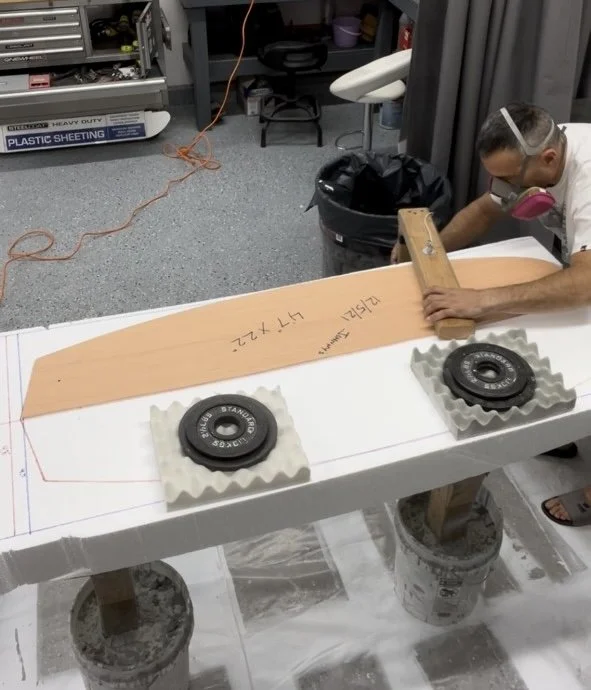
Traditionally, shapers create physical templates from existing boards, masonite, plywood, paper templates, or measurements taken at different points along a board.
AkuShaper lets you design the exact outline you want digitally and then print it full size.
Design your board in AkuShaper, adjust the nose, tail, widths, curves, and dimensions until you are happy with the shape, and then generate a full-size outline.
The template can be printed across multiple sheets on a normal home or office printer and taped together. You can also take the file to a local print shop and have the entire surfboard outline printed on a single large sheet.
From there, transfer the outline onto your blank or use the paper template to create a permanent template from masonite, plywood, or another material.
Instead of being limited to whatever physical templates happen to be hanging in your shaping room, you can create a new custom outline for virtually any board you want to build.
That is particularly useful for custom surfboards. If a customer wants the wide point moved forward, a wider tail, a pulled-in nose, or a completely different set of dimensions, you can make those changes digitally and create a new full-size template specifically for that board.
2. Print Full-Size Rocker Templates
The same principle applies to rocker.
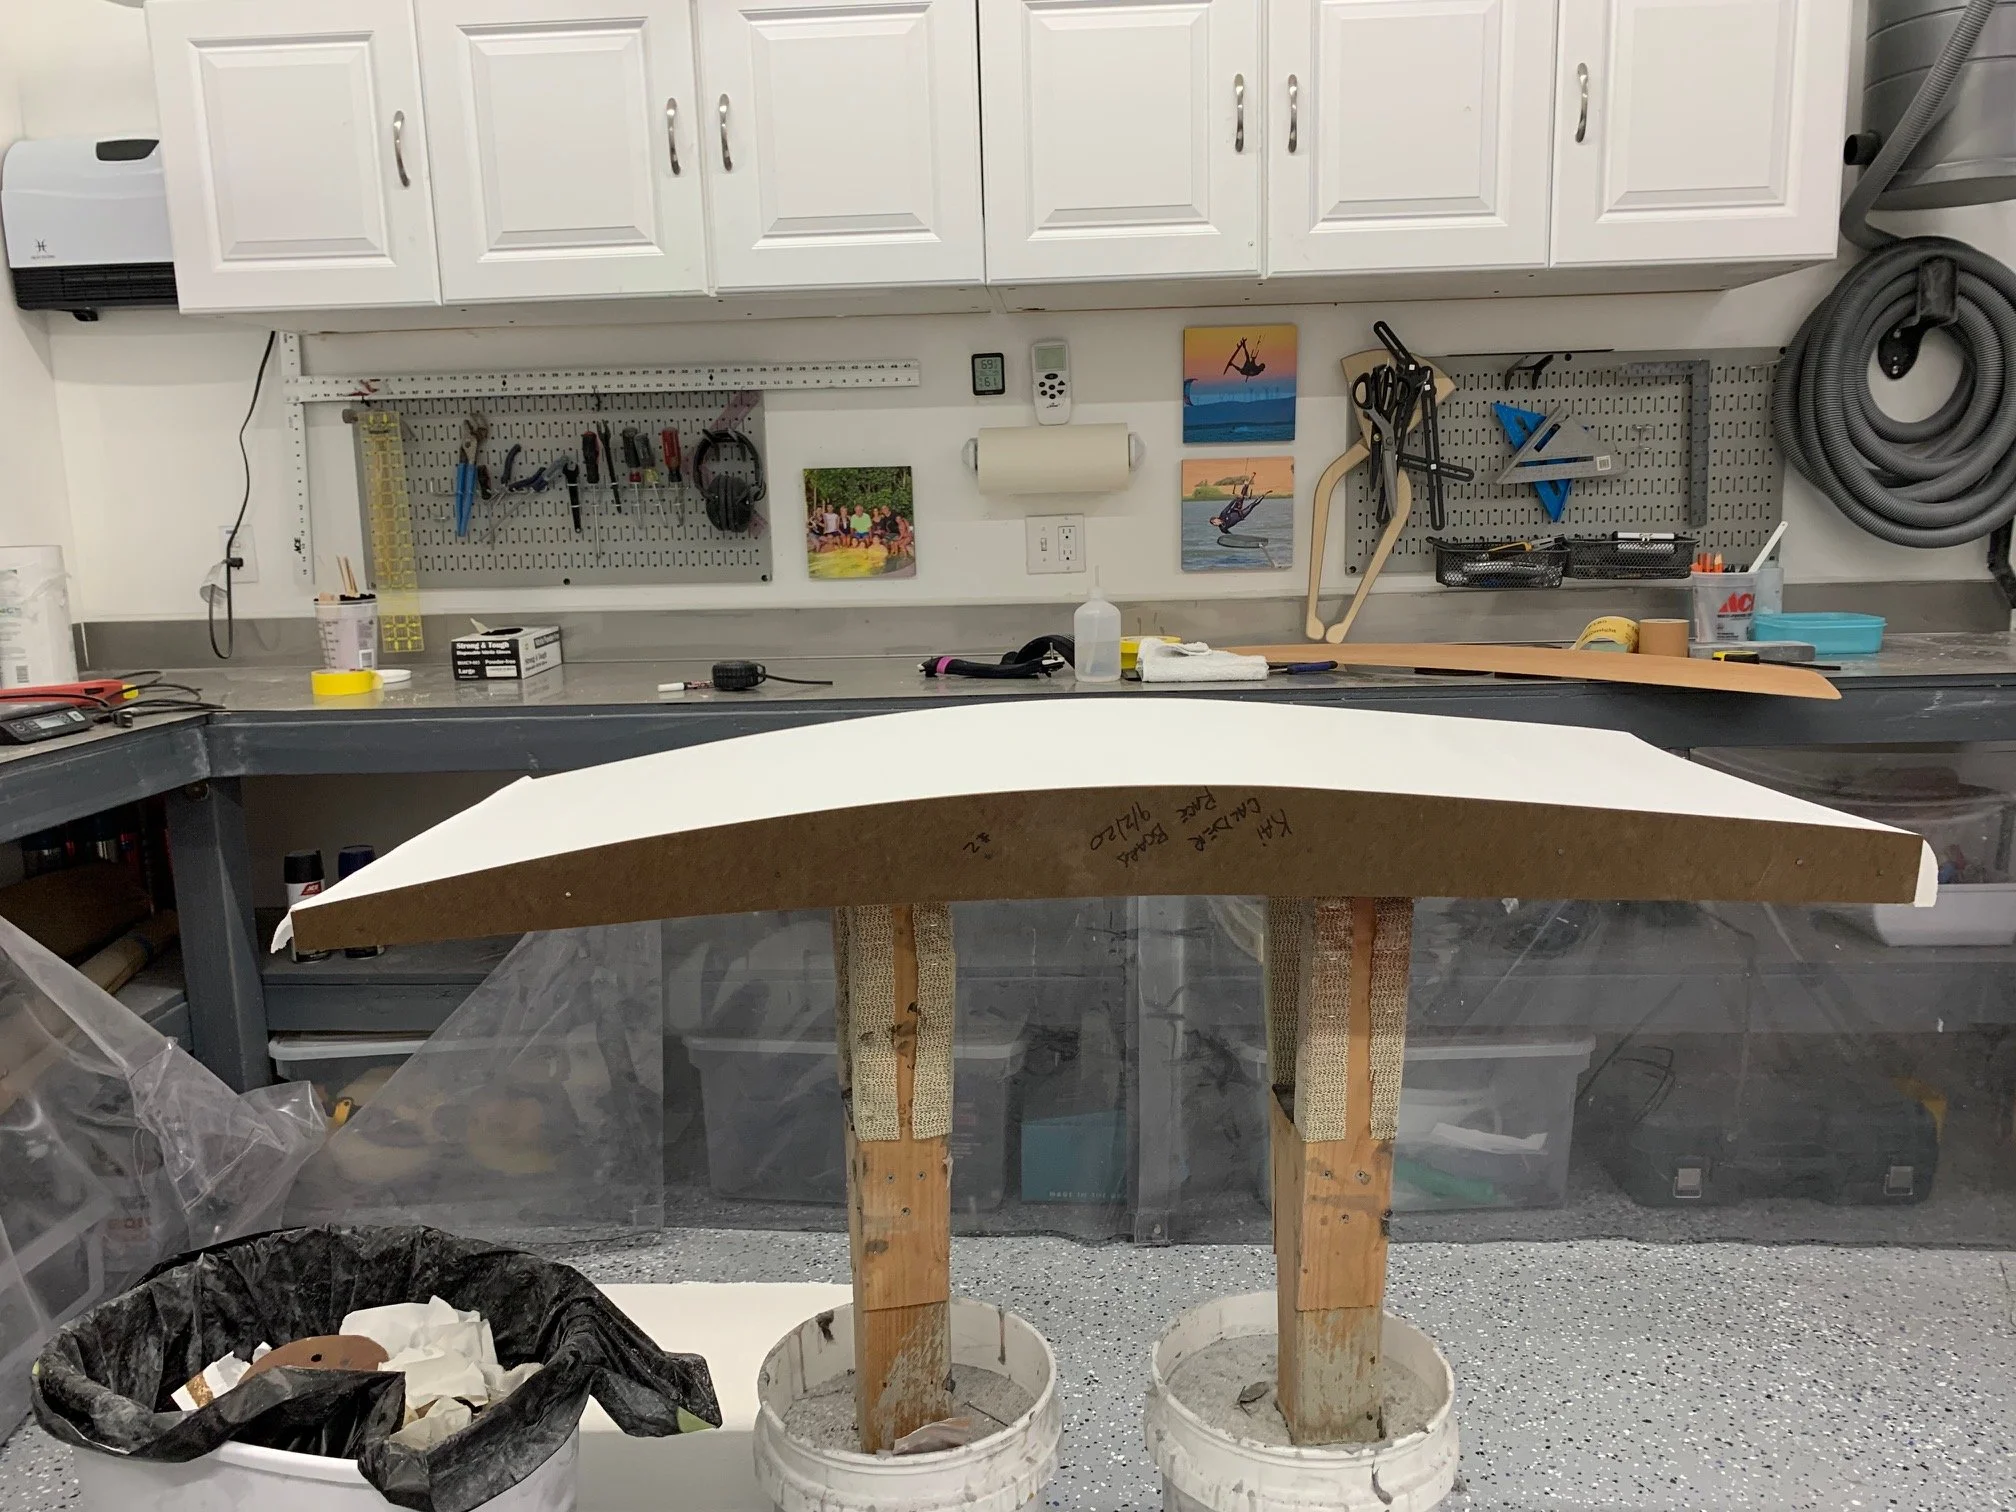
AkuShaper can generate full-size rocker profiles that give hand shapers an exact reference for the bottom and deck curves of their designs.
There are several ways to use these.
You can print a rocker profile and use it as a reference while shaping. You can create a permanent rocker template for a model you build regularly. You can use the profile to template a stringer. You can also use rocker templates when hotwiring your own foam blanks.
This becomes especially valuable when trying to reproduce a successful board.
Remembering that a board had “a little more tail rocker” isn't very useful six months later. Having the actual rocker curve saved in AkuShaper gives you something measurable and repeatable.
3. Hotwire Your Own Surfboard Blanks
Hand shaping doesn't necessarily mean starting with a commercially molded blank.
Shapers working with EPS foam can use AkuShaper to create accurate rocker profiles for hotwire cutting.
Design the board and rocker digitally, print the rocker profile at full scale, and use it to create hotwire templates for each side of the foam.
This gives you a much more controlled starting point before the planer ever touches the blank.
It can also be useful for experimental boards, unusual rocker profiles, alternative construction methods, or shapes where an appropriate stock blank simply isn't available.
4. Use Full-Size Slices to Check Your Rails
AkuShaper can also generate cross-sectional slices of the board at different positions from nose to tail.
For a hand shaper, these slices can be extremely useful.
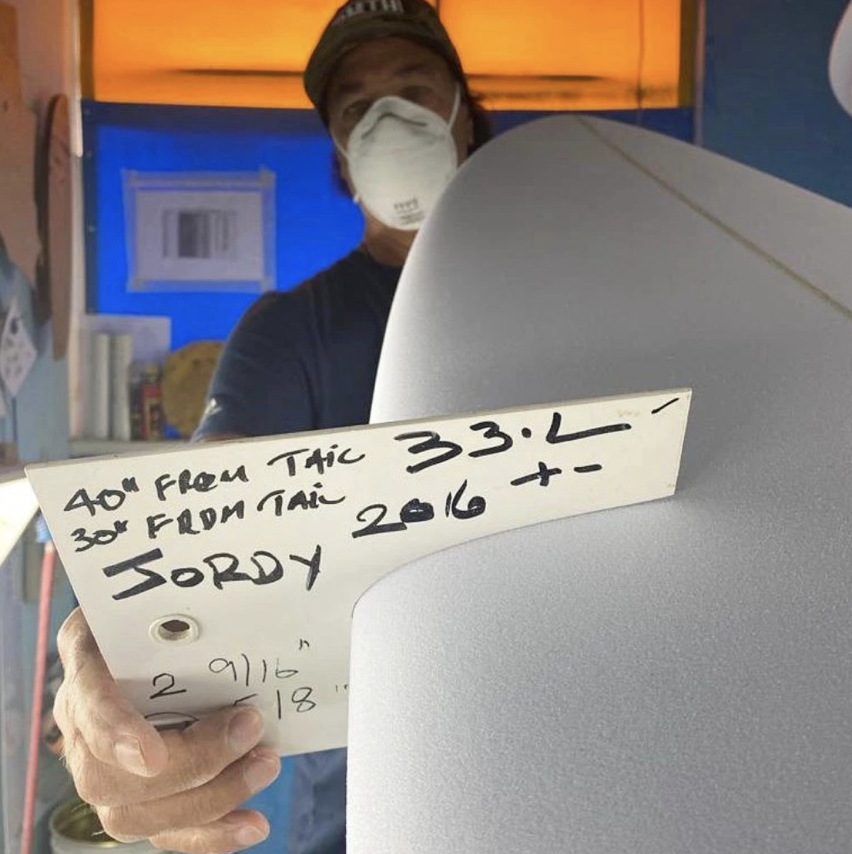
Print selected slices at full size and you have a physical reference for what the rail and bottom contour should look like at that position on the board.
You can compare the printed section against the board as you shape to answer questions such as:
Is the rail still too full?
Did I take too much foam off the deck?
Is my rail apex where I intended it to be?
Are my left and right rails symmetrical?
Is the bottom contour developing the way I designed it?
How much tuck should remain in this section of the board?
You don't necessarily need to make a template for every inch of the board. A handful of strategic stations can give you reference points from the nose through the middle and into the tail.
For shapers learning rail development, this can be especially helpful because it connects what you see on the computer with what you actually feel and see in the shaping room.
5. Plan Your Rail Bands Before You Shape Them
Rails are one of the areas where experienced hand shapers develop an intuitive feel over thousands of boards.
For someone learning—or simply trying to reproduce a particular rail consistently—AkuShaper gives you another way to visualize what needs to happen before you start removing foam.
You can use the design, slices, rail apex, tuck, thickness, and contour information in AkuShaper to help establish your rail bands.
Instead of simply eyeballing how much foam needs to come off, you can establish reference measurements and marks along the blank before connecting them with the planer or sanding block.
The software isn't shaping the rail for you. It is giving you a map.
As you become more experienced, you may rely on those references less. But they remain extremely useful when developing a new model or trying to reproduce a specific rail from a successful board.
6. Turn Your Design Into a Set of Measurements
One of the biggest advantages of designing a hand shape in AkuShaper is the amount of measurable information you have available before you start.
A surfboard isn't just length × width × thickness.
You can reference measurements throughout the board to understand how the entire shape is developing.
For example, you can check widths at different stations along the outline rather than relying only on the maximum width. You can compare nose and tail widths, thickness at different points, rocker measurements, rail geometry, volume distribution, bottom contours, and other design information.
Those numbers can become checkpoints during the hand-shaping process.
Let's say you're building a custom board that is 6'2" × 20" × 2 1/2".
Those three measurements don't tell you nearly enough to reproduce the board accurately.
Where is the wide point?
How wide is it 12 inches from the nose?
How wide is it 12 inches from the tail?
How much nose rocker does it have?
How much tail rocker?
Where is the thickest part of the board?
How quickly does that thickness taper toward the nose and tail?
How full are the rails through the middle?
Where does the rail apex transition?
What is happening with the bottom contour?
AkuShaper gives you a digital reference for these relationships.
A hand shaper can measure the blank throughout the process and continually compare the physical board against the original design.
This is especially useful for professional custom shapers because consistency matters. If a customer orders another board based on one they loved, “I think this is pretty close to the last one” isn't nearly as useful as having the original design and dimensions available.
7. Choose the Right Surfboard Blank Before You Buy It
Blank selection can save—or cost—a hand shaper a tremendous amount of work.
Choose a blank that's too small and your design may not fit.
Choose one that's unnecessarily large and you could spend considerably more time mowing foam away.
Choose the wrong natural rocker and you may have to completely change the rocker you intended to shape.
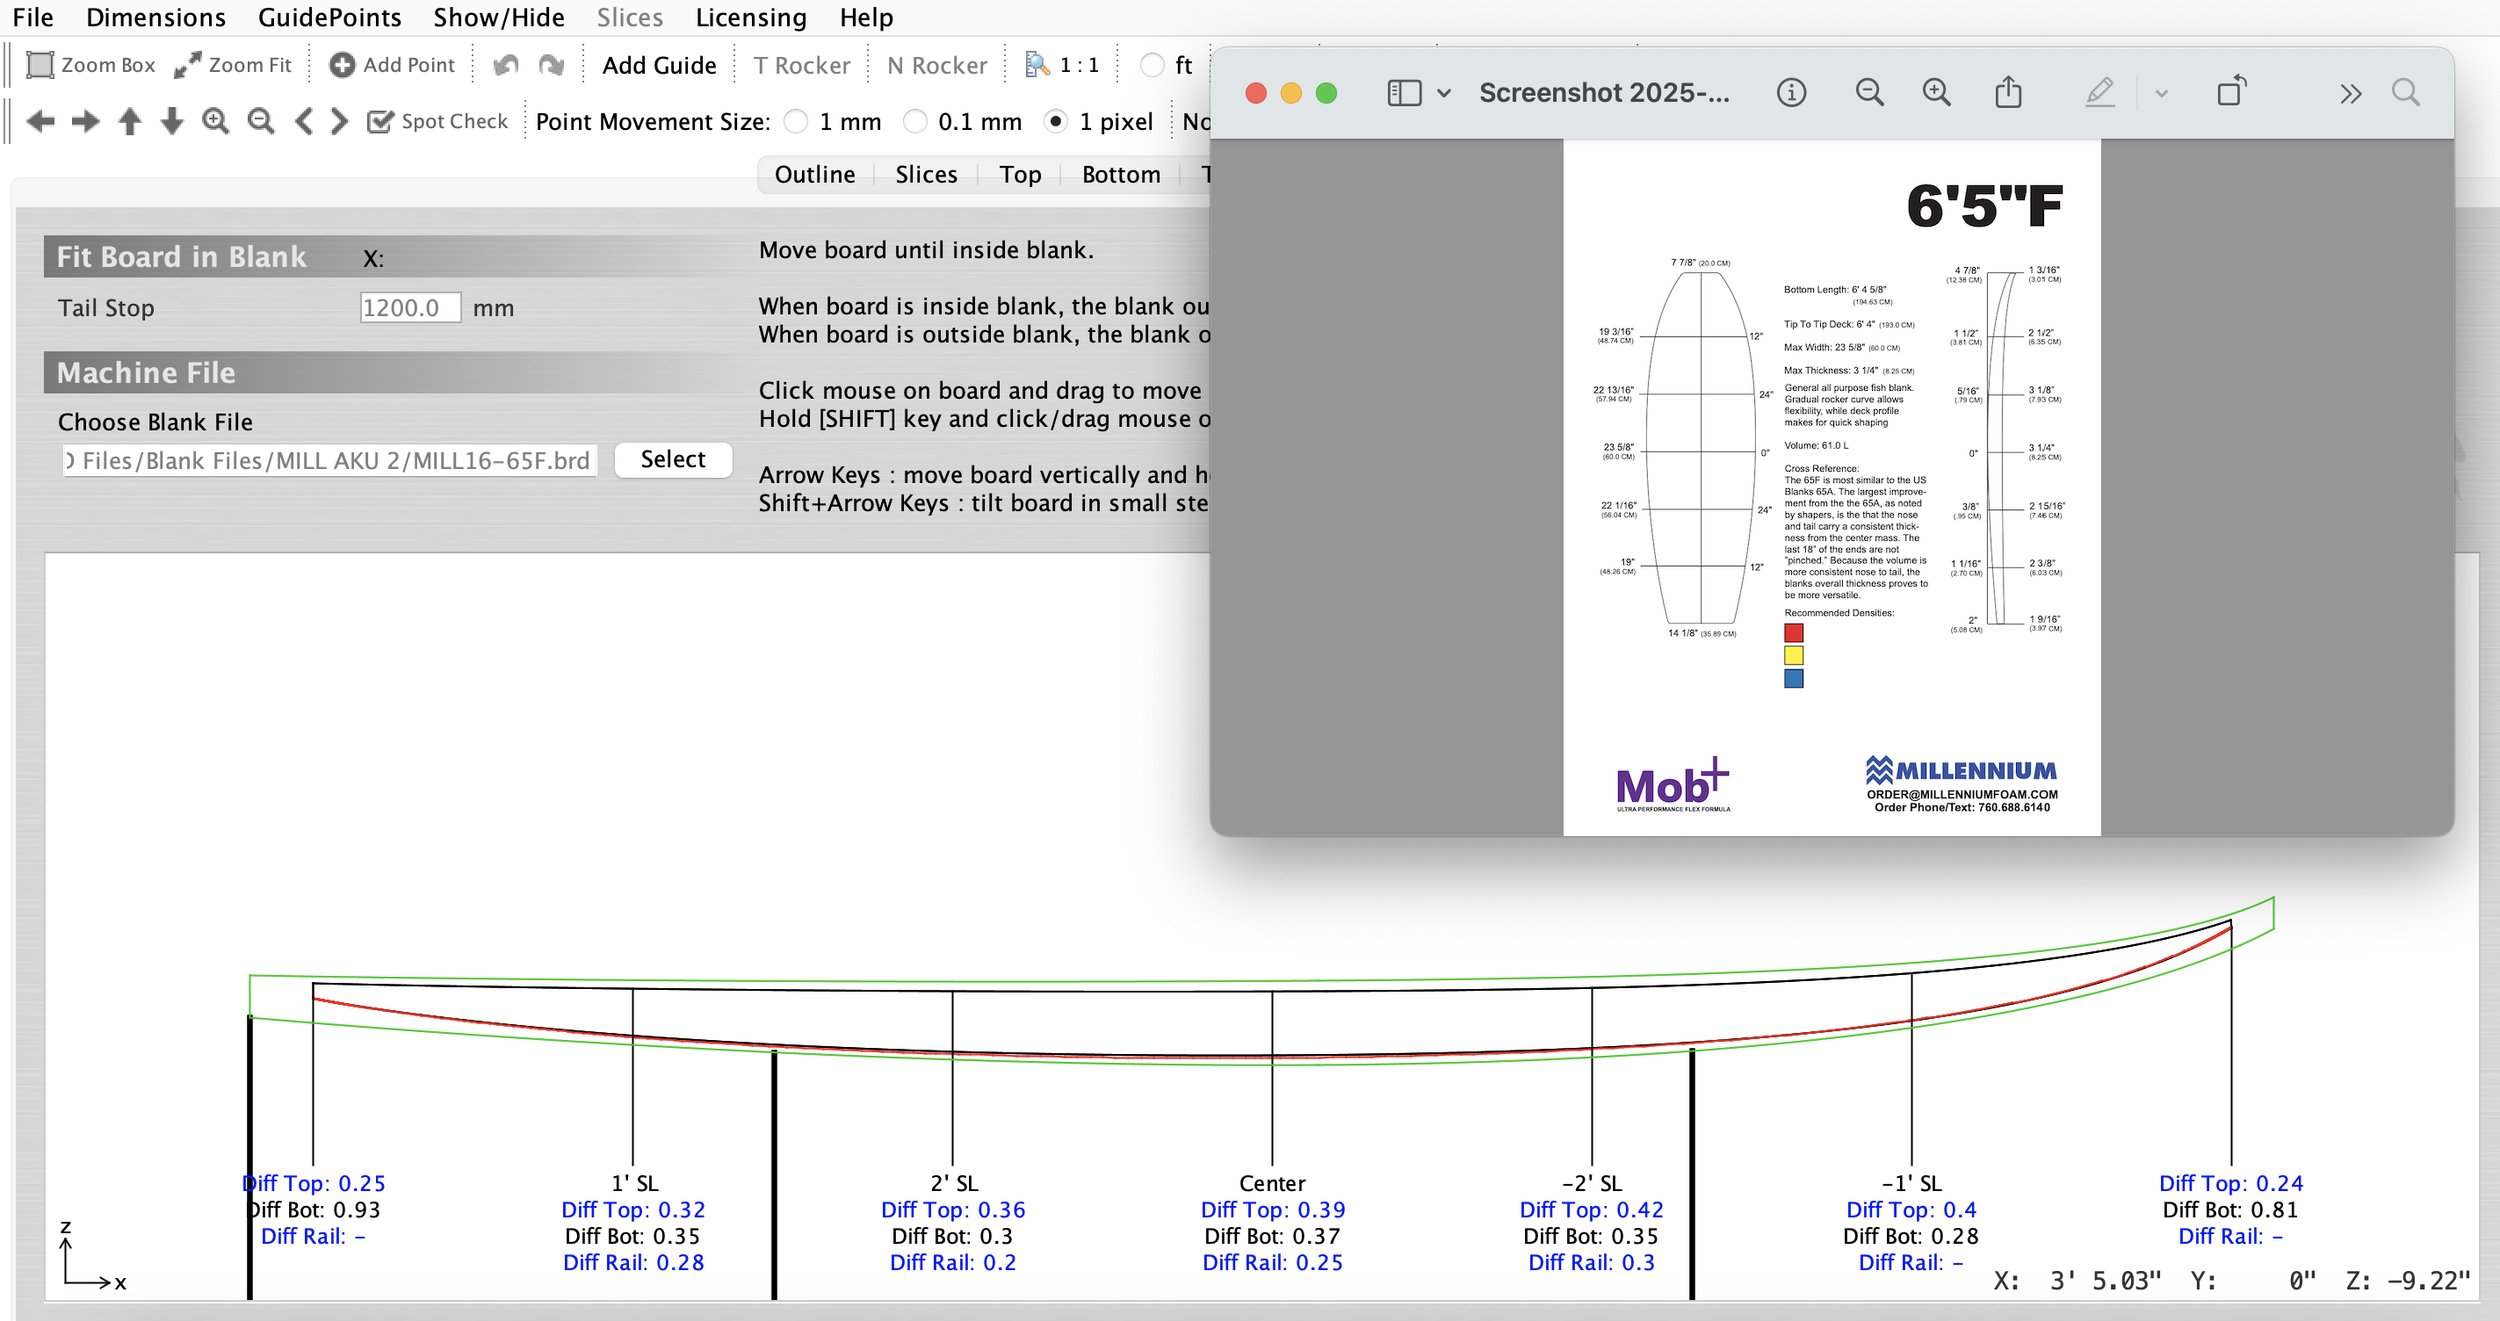
This is where AkuShaper's Blank Fitting tools become extremely valuable for hand shapers.
You can design the surfboard you want to build first and then compare that design against available surfboard blanks.
Instead of guessing whether a blank is long enough, wide enough, thick enough, or has the correct rocker, you can see how your finished design fits inside it.
That allows you to answer an important question before buying foam:
What blank gives me enough material to shape this board while staying as close as possible to my intended rocker and dimensions?
For a hand shaper, starting with the right blank means less unnecessary foam removal and a better chance of hitting the design you originally intended.
8. Plan Your Fin Placement
Fin placement shouldn't have to start with guessing and a tape measure.
AkuShaper's fin placement tools allow you to plan fin positions while you're designing the board.
Depending on the design and setup, you can establish the fin locations and use those measurements when laying out the physical board.
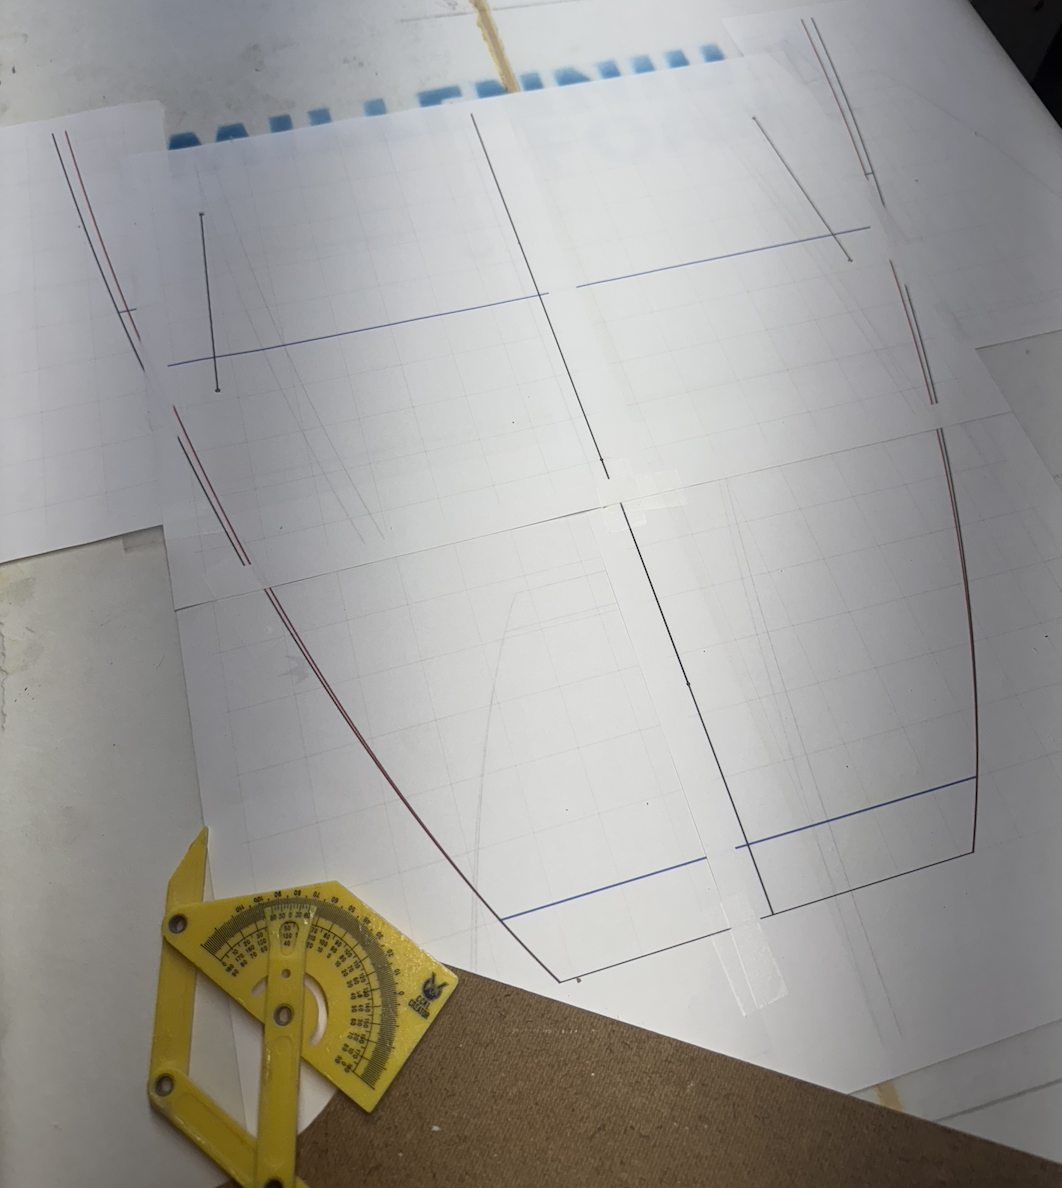
An even easier method is to include the fin positions on your full-size printed outline.
Lay the template over the board and use the printed reference points to transfer the locations directly onto the blank or finished shape. Some shapers simply punch a small hole through the paper at the appropriate reference points and transfer those marks onto the board underneath.
This can be particularly helpful when experimenting with different fin configurations or trying to keep the same fin placement across multiple boards of the same model.
9. Check Symmetry Throughout the Shape
A hand-shaped board can look symmetrical to the eye while still having small differences from one side to the other.
A digital design gives you a perfect centerline and a symmetrical reference to work from.
The outline template is the first obvious example, but you can carry the same idea into your rocker, rail sections, slices, fin placement, and measurements.
Printed cross sections can be particularly useful for comparing the left and right rails at the same station.
You can also establish measuring stations along the blank—such as every 6 or 12 inches—and check widths, thicknesses, or other references at matching locations on either side.
The goal isn't to turn hand shaping into an exercise in chasing thousandths of an inch. It's to give your eye and hands a reliable reference whenever something doesn't look or feel quite right.
10. Create a Shaping Sheet You Can Bring Into the Bay
You don't need to keep running back to the computer while you're shaping.
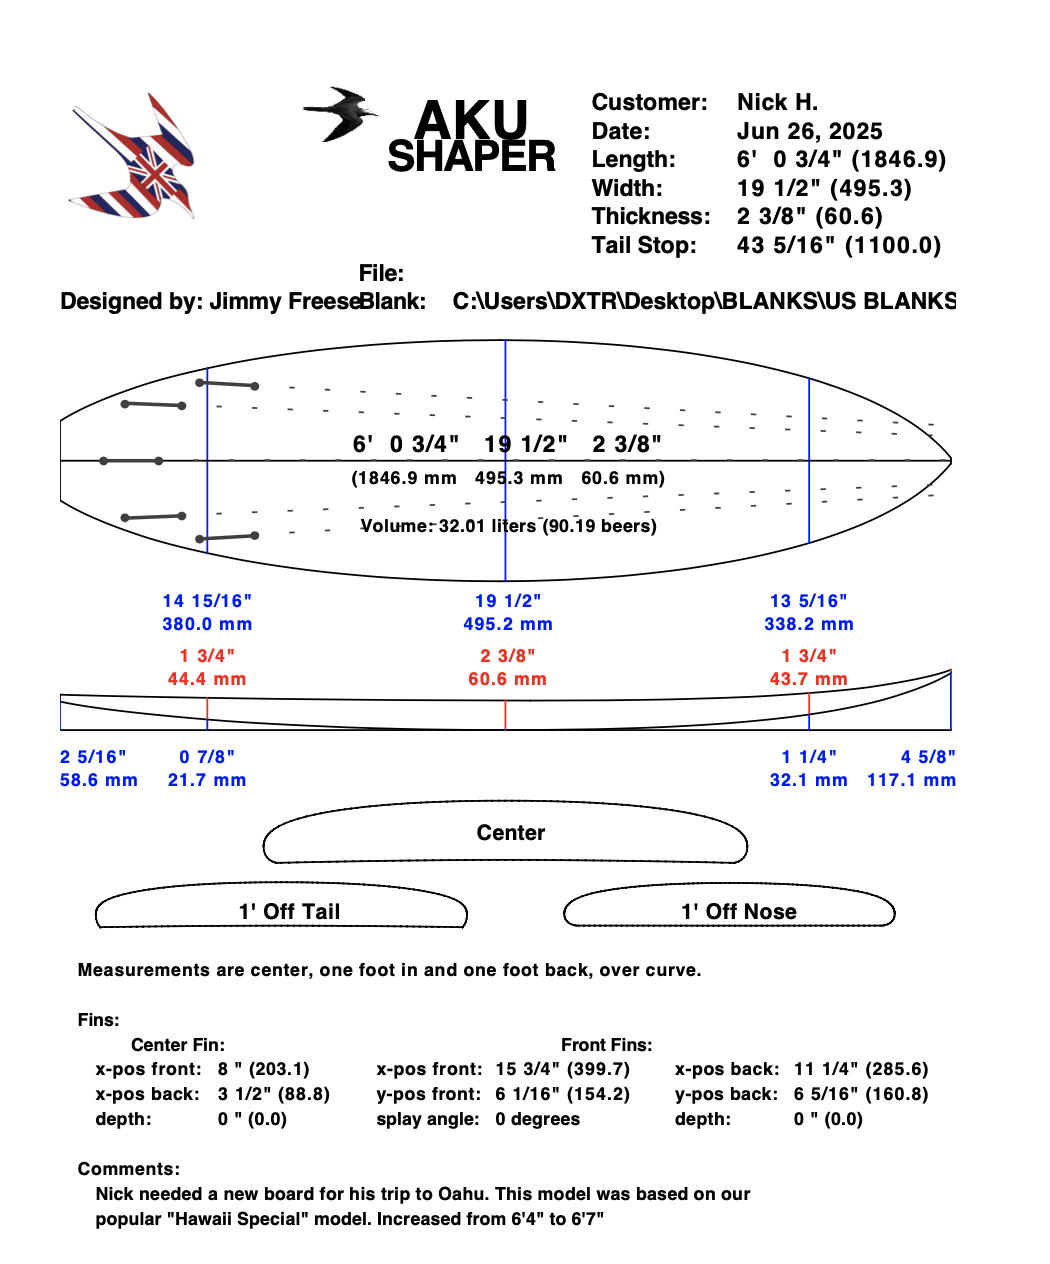
AkuShaper can generate PDF information from your designs that you can print and bring into the shaping room.
That sheet becomes the blueprint for the board.
As you work, you can refer back to the important dimensions, rocker, outline, fin positions, and other design information.
You can even make notes directly on the printed sheet as you shape:
“Left tail rail needed another pass.”
“Reduced thickness slightly behind center.”
“Customer wants less nose rocker next time.”
“Move front fins forward on next board.”
Now the shaping sheet isn't just telling you what you planned to build. It becomes a record of what you actually built.
11. Build a Digital Library of Every Board You Shape
This may be one of the biggest long-term advantages for a hand shaper.
Good boards create repeat customers.
But if you don't record what you built, recreating that magic months or years later can be difficult.
Instead of relying on memory, handwritten measurements, or a pile of physical templates, you can keep the original designs organized digitally.
A customer might call two years later and say:
“That 6'0" you made me was the best board I've ever had. Can you make me another one, but maybe a little more volume?”
If the original board is saved, you aren't starting over.
Open the design, review exactly what you built, duplicate it, and make the requested changes.
This also lets you develop models over time.
You might have:
Model A — Original
Model A — Wider tail
Model A — Customer Smith
Model A — 2027 rocker update
Instead of every hand shape being a one-off object, each board contributes to a growing library of designs and knowledge.
12. Record Customer Feedback Alongside Your Designs
The dimensions only tell half the story.
The other half is how the board actually surfed.
When customers give you feedback, record it.
Maybe they loved the board but wanted more paddle power.
Maybe the tail felt too stiff.
Maybe they wanted more hold.
Maybe the board worked perfectly and they don't want you to change anything.
That feedback becomes much more powerful when you can connect it to the actual design.
Over time, you start building your own database of cause and effect:
This is what I shaped → this is how it surfed → this is what I changed next.
That process is one of the foundations of becoming a better surfboard designer and shaper.
13. Communicate Custom Orders More Clearly
AkuShaper can also help solve one of the oldest problems in custom surfboard building: making sure the shaper and customer are talking about the same thing.
A customer saying, “I want it a little wider, but still loose, with a fuller nose and maybe a thinner rail,” leaves a lot open to interpretation.
A digital design and printed design sheet create something concrete to discuss.
You can review dimensions, outline, tail shape, rocker, volume, fin setup, and other characteristics before shaping begins.
That gives the customer a cleaner record of what they're ordering and gives the shaper a clear reference for what was agreed upon.
It also makes the process feel considerably more professional when you're selling custom surfboards.
14. Experiment Before You Remove Foam
Foam is permanent.
A computer screen isn't.
That's another major advantage of using CAD even if you intend to shape entirely by hand.
You can experiment with a wider tail, narrower nose, different rocker, fuller rail, altered thickness distribution, different fin positions, or an entirely new outline before touching the blank.
Save multiple versions.
Compare them.
Print them.
Walk away and look at them again tomorrow.
Once you're confident in the design, take it into the shaping room.
For experienced hand shapers, this can speed up the design process. For newer shapers, it can help develop an understanding of how changing one part of a surfboard affects the rest of the shape.
15. Reverse Engineer Your Favorite Hand Shapes
AkuShaper doesn't only have to be used before a board is shaped.
It can also be used to document boards you've already built.
If you hand shape a board that comes out exceptionally well, take the time to measure it and create a digital version.
Record the outline measurements, rocker, thickness, rail references, fin positions, and other important characteristics while the board is still available.
Now you've preserved the design.
This is especially valuable for shapers who have spent years working primarily with physical templates. Digitizing successful shapes allows you to preserve that knowledge while still continuing to build boards by hand.
CAD Doesn't Mean CNC
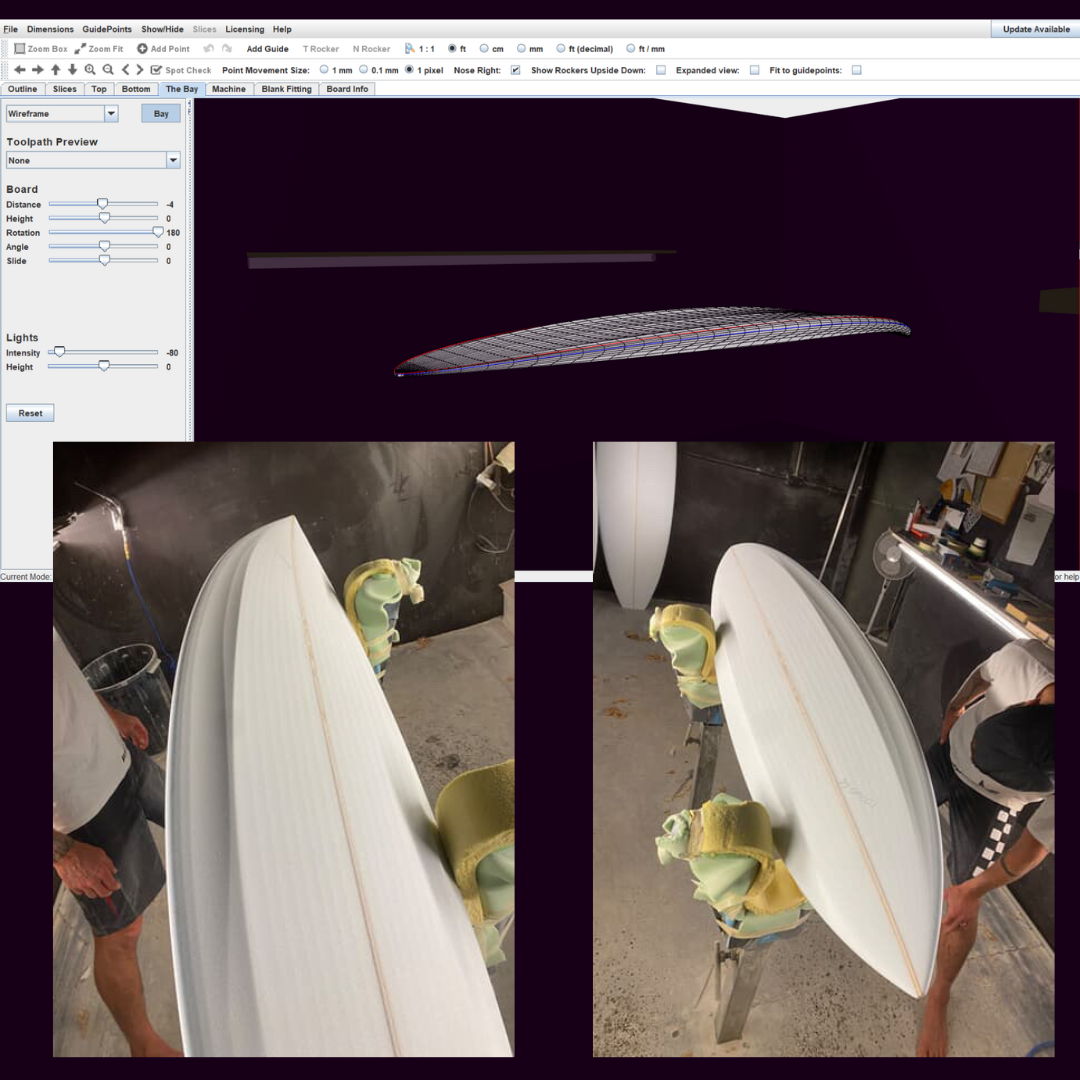
Using surfboard design software doesn't mean giving up hand shaping.
It can mean exactly the opposite.
You can still cut the outline with a saw.
You can still mow the blank with a planer.
You can still shape the rails by eye and feel.
You can still screen, sand, measure, adjust, and finish every curve by hand.
AkuShaper simply gives you better information before and during that process—and a permanent record afterward.
For a hand shaper, the goal isn't necessarily to have a computer make the board.
It's to use the computer to help you plan the board, shape it more accurately, learn from it, and build it again when you get it right.
Design digitally. Shape by hand.
And when you build a magic board, make sure you know exactly how to build it again.